If you’ve ever tinkered with your own electrical work, chances are you’ve encountered a junction box. But what exactly is the purpose of these small but mighty components? Essentially, junction boxes are designed to safeguard electrical connections from environmental factors and accidental contact. Most lights that require hardwiring into your electrical setup will include a j-box. Whether you're updating your whole system or just swapping out an old, worn-out fixture, knowing how to install and replace a junction box can save you both time and money.
Why Junction Boxes Are CrucialÂ
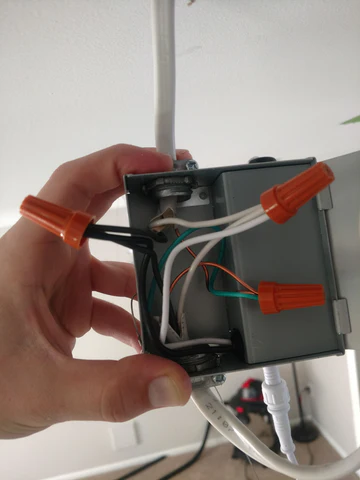
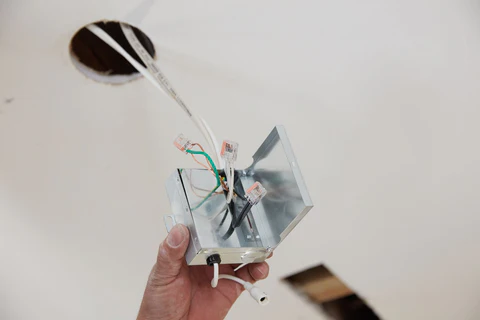
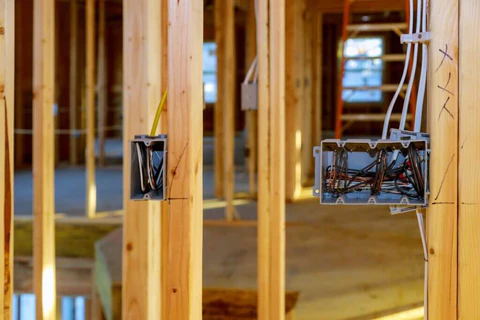
Junction boxes come in various shapes and sizes, but their main role remains consistent—to house electrical connections safely. These boxes ensure that wires meet securely, preventing short circuits and fires. They also offer easy access for maintenance if you ever encounter an electrical problem with your lights. Think of them as the backstage crew for your electrical system—working tirelessly behind the scenes to keep everything organized and functional.Â
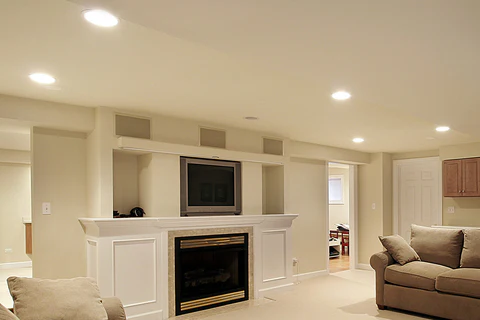
With energy-efficient options like Sunco’s slim down lights becoming increasingly popular, many homeowners are upgrading their lighting while ensuring safety and compliance with electrical codes. These stylish fixtures often come equipped with their own junction boxes, making installation a breeze.Â
Metal vs. Plastic Junction BoxesÂ
When it comes to choosing a junction box, the decision usually boils down to two materials: metal and plastic. Each material has its advantages and disadvantages, so let’s break it down!Â
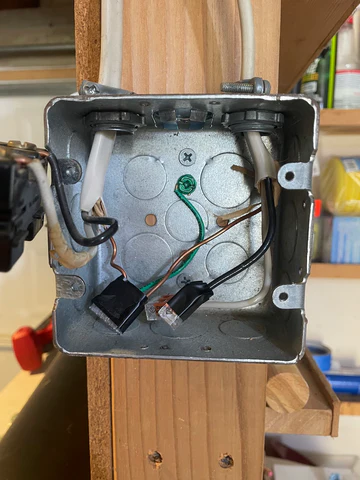
Metal Junction BoxesÂ
Pros:
- Durability: Metal boxes are robust and can withstand more physical stress than plastic ones.Â
- Grounding: They provide better grounding for electrical systems, which enhances safety.Â
- Fire Resistance: Metal doesn’t burn, adding an extra layer of fire safety.Â
Cons:
- Cost: Metal junction boxes tend to be more expensive than their plastic counterparts.Â
- Weight: They can be heavier, making installation trickier, especially in ceilings.Â
- Corrosion: If untreated or unpainted, they may corrode over time, especially in humid environments.Â
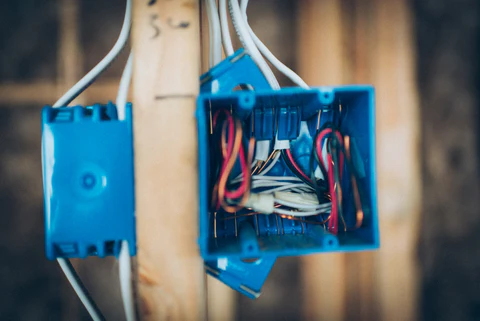
Plastic Junction BoxesÂ
Pros:
- Lightweight: Easier to handle and install, particularly in tight spaces.Â
- Cost-Effective: Generally, these boxes are cheaper, making them a popular choice for budget-conscious projects.Â
- Corrosion Resistant: Plastic won’t rust or corrode, ideal for damp areas.Â
Cons:Â
- Durability: They can crack or break more easily than metal boxes.Â
- Limited Grounding: Plastic boxes often require additional grounding methods.Â
- Not Fire Resistant: While they won’t catch fire from their wiring alone, they will melt if exposed to high heat or flames during a house fire.Â
Ultimately, your choice will depend on your specific needs, the environment, and personal preference. Â
A Step-by-Step Guide to Replacing a Junction BoxÂ
1. Prioritize Safety
Safety should always be your top priority. Before you begin, switch off the power at the circuit breaker. It’s crucial to ensure that you’re not working with live wires. Use your voltage tester to double-check that the wires are dead. Skipping this step could lead to serious accidents, so don’t take shortcuts!Â
2. Remove the Old Junction Box
With the power off, use your screwdriver to unscrew the old box from the wall or ceiling. You might need a drill if the box is attached to studs. Carefully pull it away, noting how the wires are connected. This will help when attaching the new box.Â
3. Label the Wires
Label each wire with colored tape unless they’re already color-coded, like Sunco wires. This prevents confusion when reconnecting the wires to the new box. It’s a small but essential step that saves you from unnecessary hassle later.Â
4. Disconnect the Wires
Remove the wire nuts carefully and disconnect the wires from the old box. Always work with insulated wires and avoid touching bare copper ends to prevent shocks.Â
5. Prepare the New Junction Box
If you’re using a metal box, check that it has the necessary knockouts for the wires. Knockouts are small circular tabs that you can remove to accommodate your wires. For plastic boxes, ensure they fit well in the space you’re working with.Â
6. Install the New Junction Box
Position the new box where the old one was. Ensure it’s level and secure it to the studs or ceiling using Screws. If you’re using a metal box, make sure it’s grounded as per local regulations. Sunco’s slim down lights come with ready-to-connect metal junction boxes, simplifying this process.Â
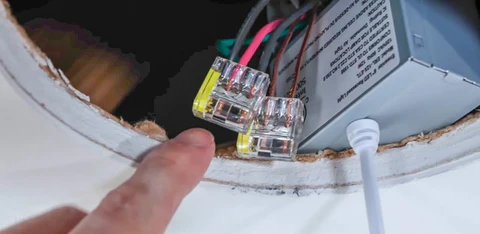
7. Connect the Wires
Reconnect the wires to the new box based on the labels you made earlier. Match the colors—black to black, white to white, and green or bare to ground. Secure the connections with wire nuts and wrap them with electrical tape for added protection.Â
8. Seal the Box
Once everything is connected, gently push the wires back into the box. If your box has a cover, screw it in place tightly. A snug cover ensures the connections remain protected from dust and moisture.Â
9. Restore Power and Test
Return to your circuit breaker and restore power. Use your voltage tester to confirm everything is functioning correctly. Installing Sunco’s lights allows you to witness their sleek design and impressive performance firsthand!Â
10. Tidy Up
Finally, clean up your workspace. Dispose of the old junction box and any debris. Take a moment to appreciate your handiwork—you’ve successfully completed the task!Â
Wrapping Things UpÂ
Replacing and installing a junction box might seem intimidating initially, but with proper guidance and the right tools, it can be a satisfying DIY project. Whether you opt for a durable metal box or a lightweight plastic one, ensuring safe and correct connections is what truly matters. Plus, stylish options like Sunco’s slim down lights not only boost your home’s safety but also enhance its visual appeal. So grab your tools, embrace your inner DIY enthusiast, and get started—your home will thank you for it!Â
black concrete screws,black tapcon concrete screws,blue concrete screws,blue tap concrete screws
NINGBO TAURUS INDUSTRY CO.,LTD. , https://www.taurushardware.com